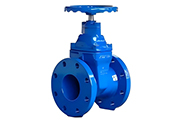
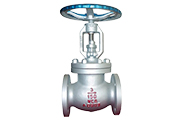
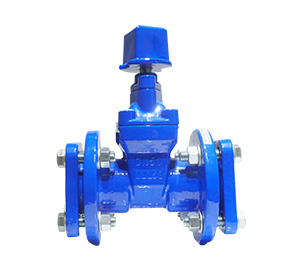
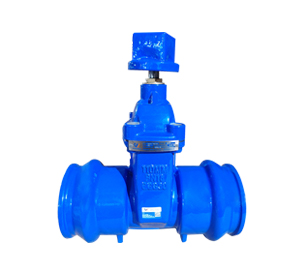
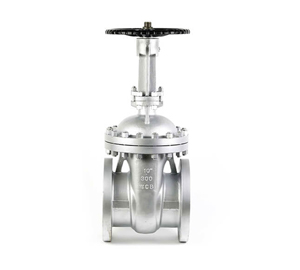
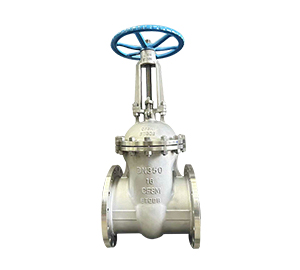
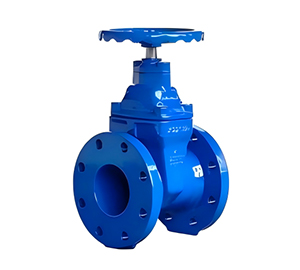
Gate valve maintenance quality standards
Valve body:
1. The valve body should be free of defects such as blisters, cracks, and erosion, and should be dealt with promptly when discovered.
2. There should be no debris in the valve body and pipes, and the entrance and exit should be smooth.
3. The plug at the bottom of the valve body should ensure reliable sealing and no leakage.
Stem:
1. The curvature of the valve stem should not be greater than 1/1000 of the total length, otherwise it should be straightened or replaced.
2. The trapezoidal thread part of the valve stem should be intact, without defects such as breakage or bite, and the amount of wear should not be greater than 1/3 of the thickness of the trapezoidal thread.
3. The surface should be smooth and free of rust. There should be no flaky corrosion or surface delamination in the contact area with the packing seal. Those with uniform corrosion point depth ≥ 0.25 mm should be replaced with new ones. The smoothness should be guaranteed to be above ▽6.
4. The connecting threads should be intact and the pins should be fixed reliably.
5. The combination of the cutting rod and the cutting rod nut should rotate flexibly without jamming during the entire stroke. The threads should be lubricated and protected with lead powder.
Packing seal:
1. The pressure and temperature of the packing used should comply with the valve medium requirements, and the product should be accompanied by a certificate or undergo necessary testing and identification.
2. The packing specifications should comply with the size requirements of the sealing box, and packing should not be replaced by packing that is too large or too small. The height of the packing should comply with the size requirements of the valve, and a thermal tightness allowance should be left.
3. The packing interface should be cut into an oblique shape with an angle of 45°. The interfaces of each ring should be staggered by 90°-180°. The length of the cut packing should be appropriate. There should be no gaps or overlaps at the interfaces placed in the stuffing box.
4. The packing seat ring and packing gland should be intact and free of rust. The inside of the stuffing box should be clean and smooth. The gap between the door rod and the seat ring should be 0.1-0.3 mm, and the maximum should not exceed 0.5 mm. The gap between the inner wall of the stuffing box is 0.2-0.3 mm, and the maximum is no more than 0.5 mm.
5. After tightening the hinge bolts, the pressure plate should remain flat and the tightening force should be uniform. The inner hole of the packing gland and pressure plate should be consistent with the clearance around the valve stem. The packing gland should be pressed into the packing chamber by 1/3 of its height.

Sealing surface:
1. After maintenance, the sealing surface of the valve disc and valve seat should be free of spots and grooves. The contact part should account for more than 2/3 of the valve disc opening width, and the surface finish should be above ▽10.
2. Assemble the test valve disc. After inserting the valve disc into the valve seat, ensure that the valve core is 5-7 mm higher than the valve seat to ensure tight closing.
3. When assembling the left and right valve discs, the self-adjustment should be flexible and the anti-falling device should be intact and reliable.
Stem nut:
1. The internal bushing screws should be in good condition and should not be broken or buckled randomly. The fixation with the shell should be reliable and without looseness.
2. Each bearing component should be in good condition and rotate flexibly. There are no cracks, rust, heavy skin and other defects on the surface of the inner jacket and steel balls.
3. The disc spring should have no cracks or deformation, otherwise it should be replaced with a new one. 3.5.4 The fixing screws on the surface of the lock nut must not be loose. The valve stem nut rotates flexibly, and the axial clearance is guaranteed to be no more than 0.35 mm.
| No | Maintenance items | Key points of process | Quality requirements |
| 1 | Valve body appearance inspection | 1. Remove dirt and remove insulation
2. Check the surface of the valve body for defects such as heavy skin, cracks, and blisters.
|
There is no heavy skin, cracks or blisters on the surface of the valve body. |
| 2 | valve disintegration | 1. Make cooperation records before disintegration.
2. The valve is open during disassembly. 3. Pay attention to the disassembly and assembly sequence. 4. Do not damage parts. 5. Clean the removed bolts and parts. 6. Spectral review of internal parts of alloy steel valves |
1. Bolts and parts should be in good condition.
2. The internal parts of the alloy steel valve pass the spectrum inspection. |
| 3 | Valve stem inspection and repair | 1. Clean the dirt on the surface of the valve stem and check for defects in the valve stem.
2. Straighten or replace if necessary. 3. Carry out surface nitriding treatment as appropriate. |
1. The curvature of the valve stem is not greater than 1% of the total length of the valve stem, and the out-of-roundness is less than 0.05mm.
2. The valve stem should be smooth, without pitting, scratches or cracks. The uniform pitting depth of the contact area between the valve stem and the packing shall not be greater than 0.3mm, and there shall be no defects in other parts. 3. The valve stem thread is intact and should be replaced when the wear exceeds 1/3 of the original thickness. |
| 4 | Inspection and repair of valve plate, valve seat and valve body | 1. Check the valve plate, valve seat and valve body for cracks, grooves and other defects.
2. Use red red powder to check the consistency of the sealing surface, and determine the repair process and grinding method based on the inspection. 3. Polish the joint surface between the valve body and the self-sealing gasket, and replace the removable valve seat that cannot be repaired. 4. Check whether the joint surface between the valve seat and the valve body is firm. |
1. There are no cracks or grooves in the valve plate, valve seat and valve body.
2. The sealing surface should be straight, the roughness of the sealing surface should be less than 0.1µm, the radial coincidence should not be less than 80%, and the sealing surface should be in uniform contact around the circumference without disconnection. 3. There are no foreign objects or other defects inside the valve body. 4. The joint surface between the valve body and the self-sealing gasket is smooth and has no grooves. 5. The valve body and valve seat are firmly combined with no looseness.
|
| 5 | Valve cover inspection and repair | 1. Clean the stuffing box and polish the inner wall of the stuffing box, the packing gland and the seat ring.
2. Polish the joint surface of the valve cover and sealing gasket. |
1. The inner wall of the stuffing box, the stuffing box gland and the seat ring are smooth and clean.
2. The joint surface of the valve cover and sealing gasket is flat and smooth. |
| 6 | Inspection and repair of brackets | 1. Clean the thrust bearing and check whether the bearing is worn. Rusted and broken.
2. Check the valve stem nut on the bracket. 3. Check whether the bracket is damaged. 4. Polish the valve body joint surface. |
1. The bearing quality meets the requirements, otherwise it must be replaced.
2. The valve stem nut is intact. 3. The bracket is not damaged. 4. The valve body joint surface is flat. |
| 7 | Repair of four-in-one rings (six-in-one rings), washers, etc. | 1. Polish the four-ring and washer.
2. Check the material and hardness of the four-in-one ring.
|
1. The four-ring and gasket are smooth and free of rust. The thickness of the four-ring is uniform, without damage or deformation. The gasket has no deformation, cracks or other defects.
2. The material and hardness of the four-ring ring meet the requirements. |
| 8 | Valve assembly | 1. When assembling the valve, the valve should be in the open state.
2. Assemble according to the matching order. 3. Add lubricant. 4. Replace the packing. 5. Adjust the contact area between the gate plate and the valve seat. 6. Install the four-in-one ring in order. 7. Tighten all connecting parts evenly. 8. Check the clearance between various parts |
1. When the valve is in the closed state, the center line of the valve plate should be higher than the center line of the valve seat.
2. The valve stem and valve plate are firmly connected, and the valve stem fits well. 3. The gap between the gasket and the valve body and valve cover is 0.1-0.3mm. 4. The gap between the valve stem and the gland is 0.1-0.3mm. 5. The gap between the packing and the gland is 0.1-0.15mm. 6. The gap between the valve stem and the seat ring is 0.1-0.2mm. 7. The gap between the seat ring and the stuffing box is 0.1-0.15mm. 8. The accessories and labels are complete, and the valve body is well insulated. |
| 9 | Switch test | Calibrate the switch degree indication and check the switch condition | The valve has no jamming or virtual stroke during the full switching stroke. |
| 10 | Replace with new valve | 1. Valve disassembly inspection and necessary spectrum inspection
2. 100% flaw detection inspection of butt welding joints. 3. Hydrostatic test when necessary. |
1. All components are in good condition, and the material and gate valve quality meet the requirements.
2. The quality of the welding joint is qualified. 3. During the hydraulic pressure test, there is no leakage on the joint surfaces and sealing surfaces. |